Tactair Fluid Controls, Inc.

Special to Hydraulics & Pneumatics
Seeing Is Believing: Looking Inside Saves Time, Money
Liverpool, N.Y.-based Tactair Fluid Controls, Inc., had been looking for a better way to inspect the intricate internal features of its products. An ISO 9001-2000/AS9100 certified designer and manufacturer of hydraulic and pneumatic controls for the aerospace industry, Tactair specializes in systems for wheel-brake control, landing-gear control, nose-wheel steering control, flight control and engine/nacelle control. Its products are found on fixed and rotary wing business, commuter, transport and military aircraft and include valves, actuators, dampers and manifolds.
In these kinds of applications, packaging, weight and contamination resistance tend to be critical. The maze-like flow-path geometries, very fine surface finishes and precision metering edges that can result are common. Such internal features defy easy inspection.
Over the years, Tactair had acquired a variety of equipment for visual inspection. It all was underused, according to Tactair manager Bob Buttner, because image quality was poor. Tactair had looked into borescopes, but had not found a moderately priced scope capable of delivering the sharp, clear images the company required.
Thus, Tactair resorted to two main ways of inspecting internal features such as deep bores, ID grooves, seat edges, chamfers and metering holes. The first–the tried-and-true method of cutting a piece in half to look at the internal configuration–wasted time and materials. The other method was to check indirectly by filling the part with a molding compound, then pulling it out to examine it. This also took too much time and didn’t work with all geometries.
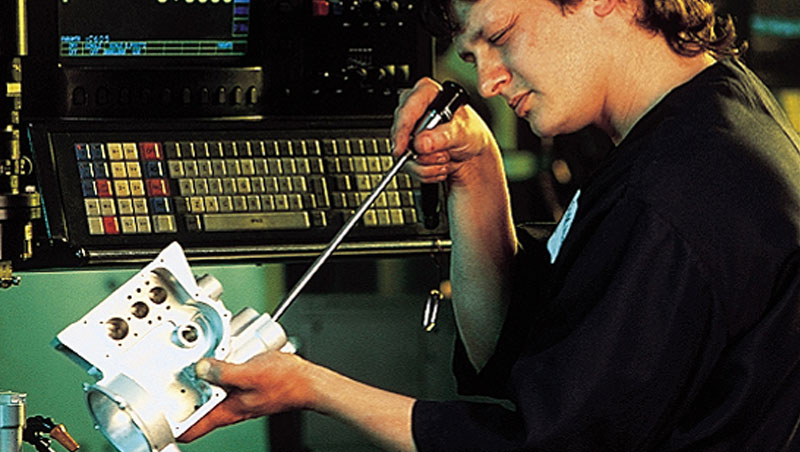
Today, Tactair uses Hawkeye Precision Borescopes from Gradient Lens Corporation to quickly and easily inspect parts at each step of the manufacturing process. Tactair uses scopes for inspections at each stage of manufacturing:
- In the CNC turning and milling areas where bores, ID grooves and chamfers, and seat edges are completed, machinists use borescopes to look for tool marks and burrs.
- In the electrical discharge machining (EDM) area, where they reach deep into a bore to create a metering hole or oil passage, machinists use borescopes to check that they’ve placed the feature correctly and that edges are clean and sharp.
- In the manual machining area, toolmakers use borescopes to check a feature’s placement, surface finish, burrs and tool marks.
Surface finish is crucial to many of Tactair’s internal features. During set-up, it is also a key indicator of cutting conditions, telling machinists whether feeds and speeds, cutting-tool geometry, and work-piece and tool rigidity are appropriate. The borescopes provide a fast and effective means of evaluating these conditions, too. Tactair uses both straight-on or (with a simple adapter) 90-degree view configurations extensively, sometimes switching between them on the same job to check different features.
By using borescopes, Tactair has saved substantial labor and materials costs. On one job alone, the company estimates these labor and materials savings have already paid for the cost of the scopes. But the company also has reaped an unexpected bonus: Engineers and machinists have begun using scopes to optimize the set-up process with less trial and error – thus saving the company more money.
Tactair can’t put an exact number to the productivity gain and cost savings that borescopes have made possible, but Buttner has little doubt that they’ve contributed to Tactair’s bottom line. “On jobs where we used to set up, run, and then cut the first piece (in half) to see if everything was all right,” he explains, “we now use borescopes. That’s one production piece saved. We do a lot of short runs–typically between 10 and 50 pieces–so that’s important.
“We also save time,” he adds. “The savings can vary anywhere from the few minutes it would take to pull the part off the machine and try to check it by another means–by a microscope or comparator, for example–to hours. Suppose that instead of using a borescope to check a bore right on the machine, you finish the part and then built and tested a valve, only to find some kind of friction drag or leakage. At that point, you have to pull the whole thing apart and rework the part. Under those conditions, you could have paid for the borescope in one work piece.”
The Hawkeye borescopes also help Tactair people optimize the manufacturing process itself, by letting everyone from design engineers to machinists see what’s really going on as tools cut through materials. That gives them a clearer understanding of how materials behave under certain conditions. For instance, says Buttner, “For an offshore valve body we make, we use a tough 316 stainless steel. It’s a hard-to-machine material: It can be gummy, it can work harden, it can give you poor surface finishes. So we experiment with different tools–boring bars, reamers, roller burnishers–and different processes, like using a coolant or special cutting oil. We can go right in there with the borescope and see which one of these processes, or which combination, is giving us the result we want.”
Tactair personnel also employ the scopes in video viewing of internal features, using a video adapter with a camera and large screen monitor. Groups including engineers, machinists, and test technicians can examine parts together on the monitor to solve problems and improve processes.